How to get pusherbeams instance ID and secret key?
Last update: 28/Nov/2024
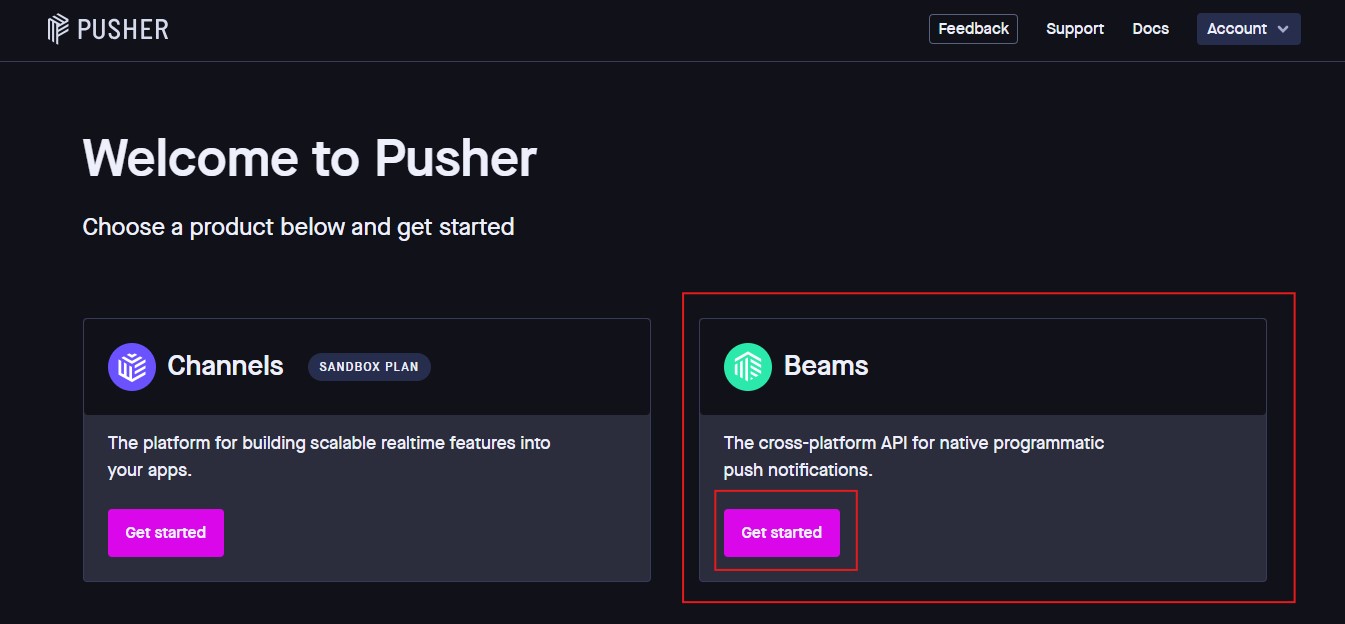
1.Create a Pusher Beams Account
Visit the PusherBeams website and log in with your Pusher account.
If you don’t have an account, sign up for one.
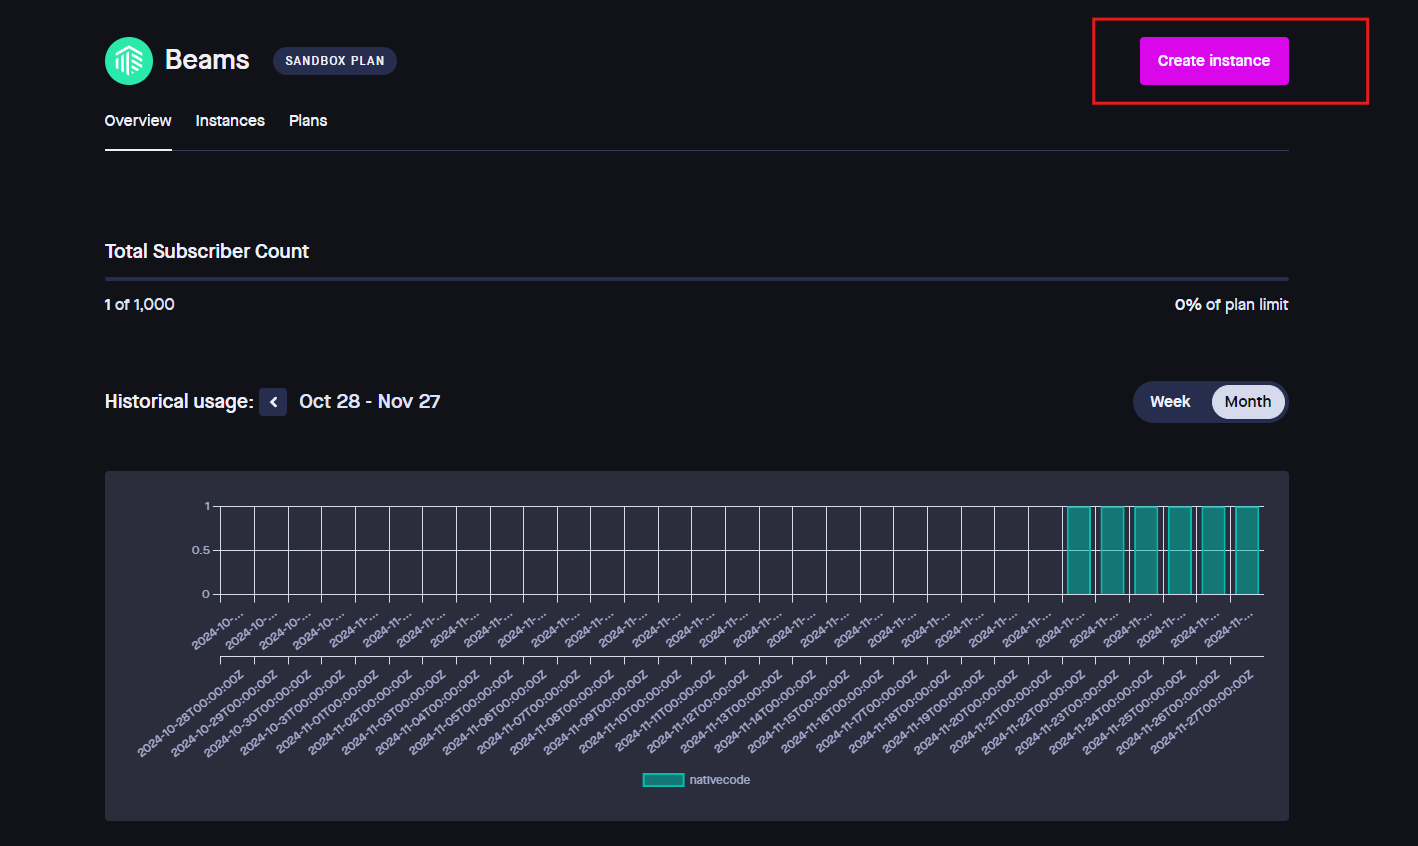
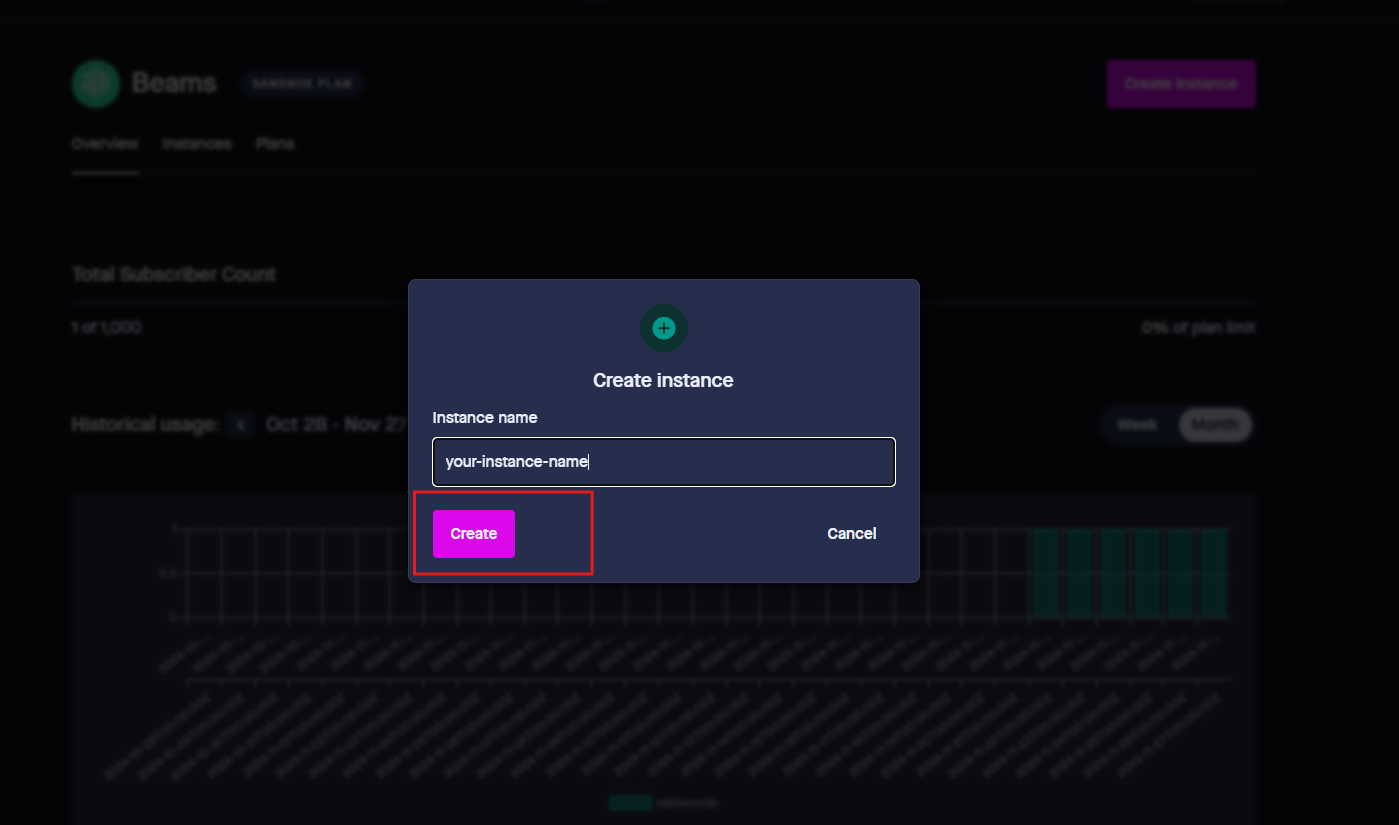
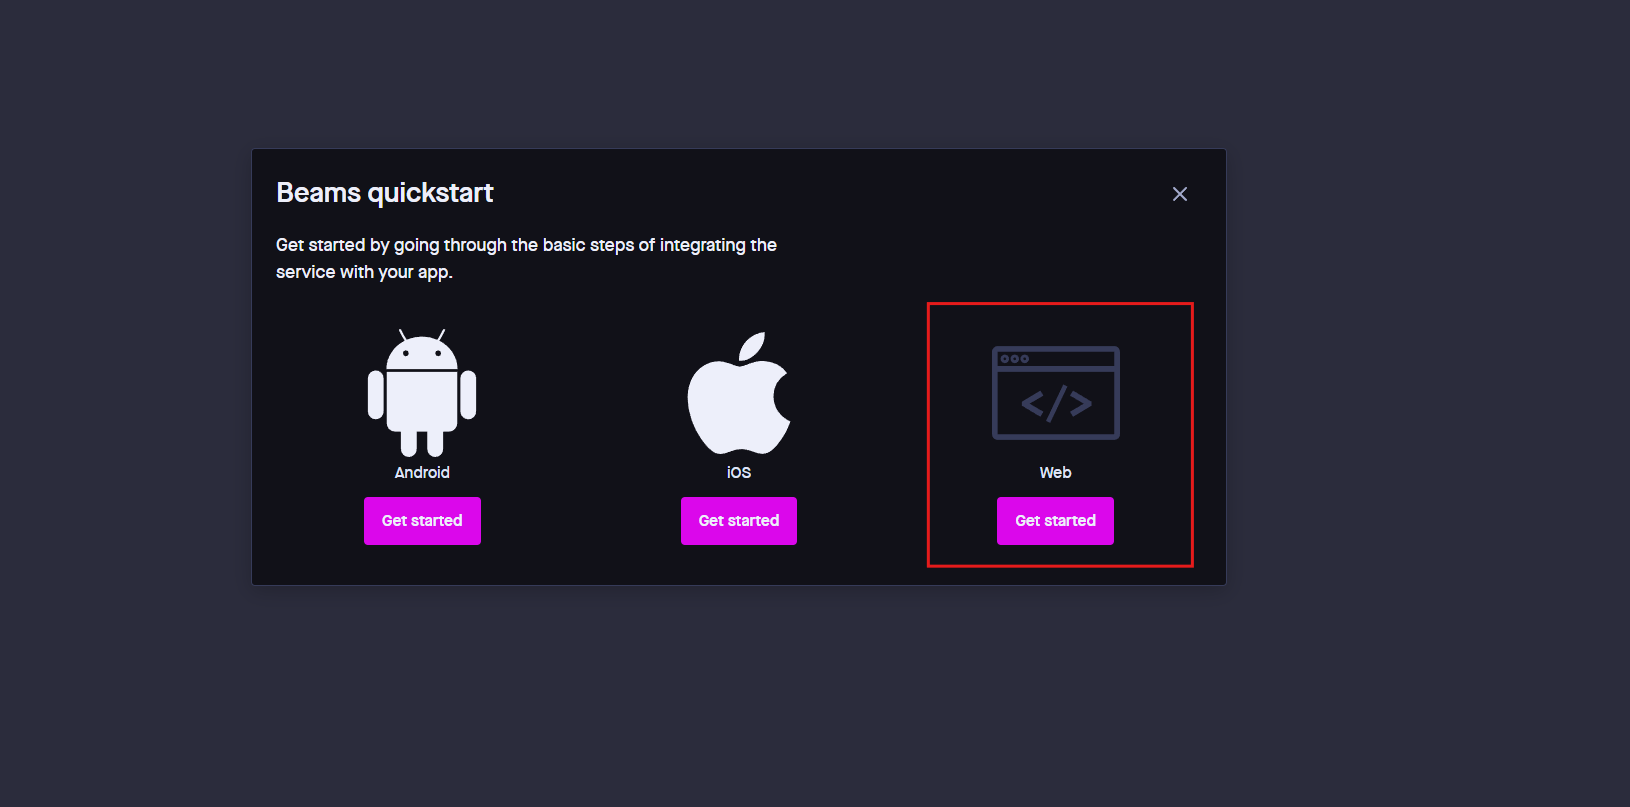
2. Create a New Beams Instance
Once logged in, navigate to the Beams dashboard, click on Create New Instance, provide a name for your instance (e.g., "Web Notifications"), and select Web as the platform.
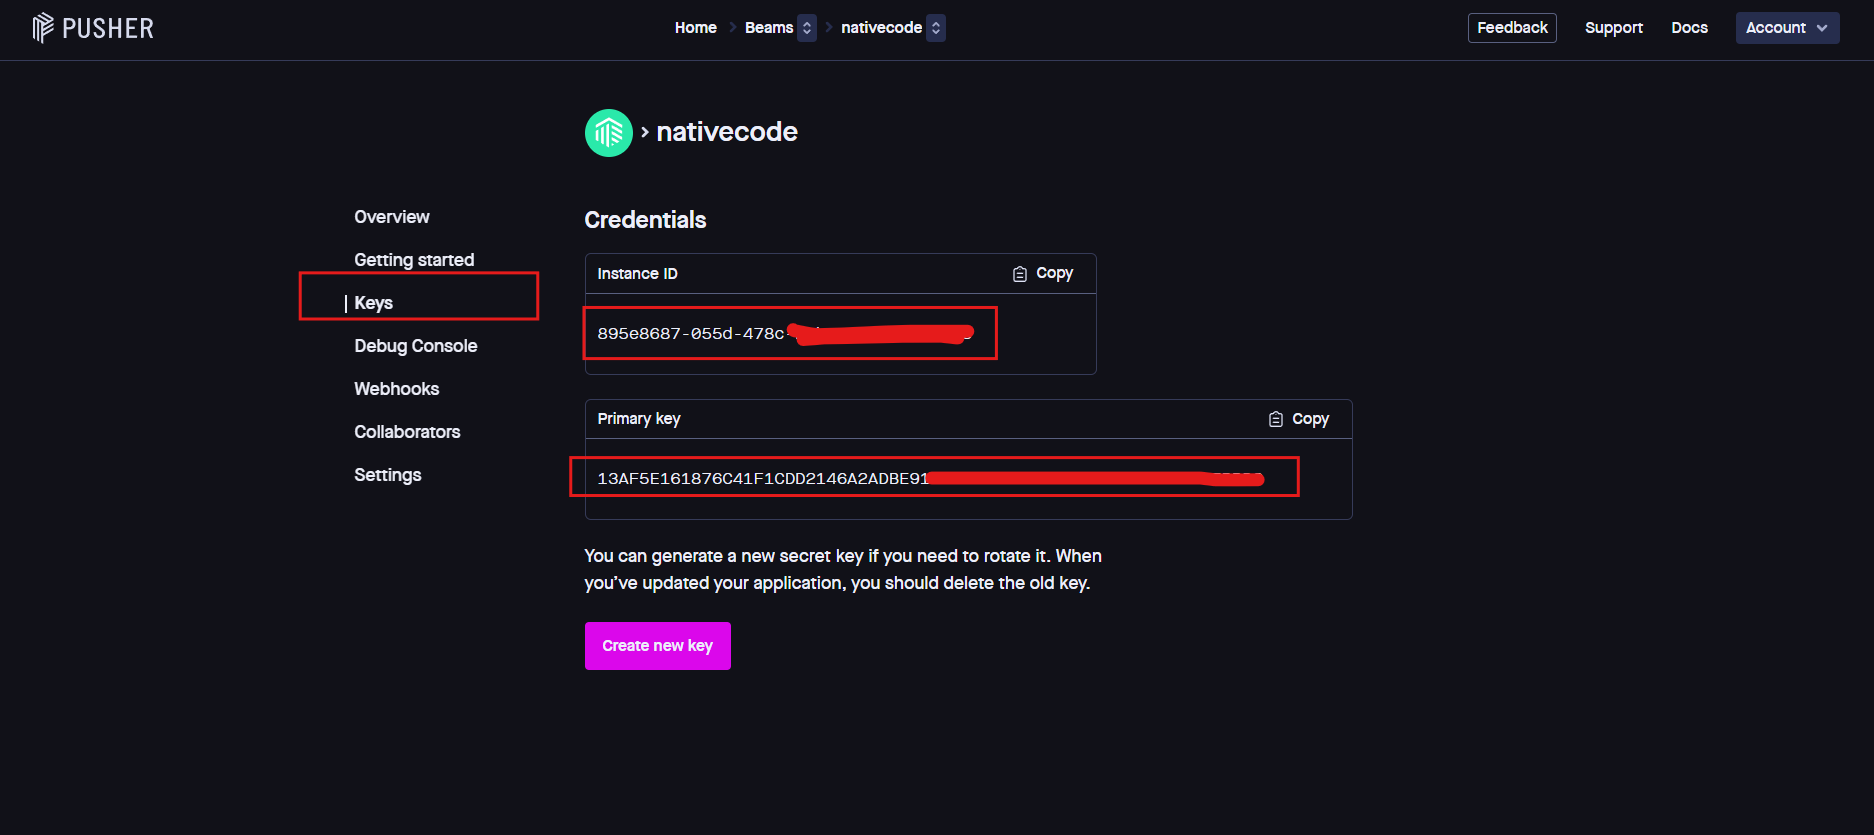
3. Retrieve Your Instance ID and Secret Key
After creating the instance, go to the Credentials section in your Beams dashboard. Here, you will find: Instance ID, a unique identifier for your Beams instance, and Secret Key, the secret key used for authentication (keep it private and secure).
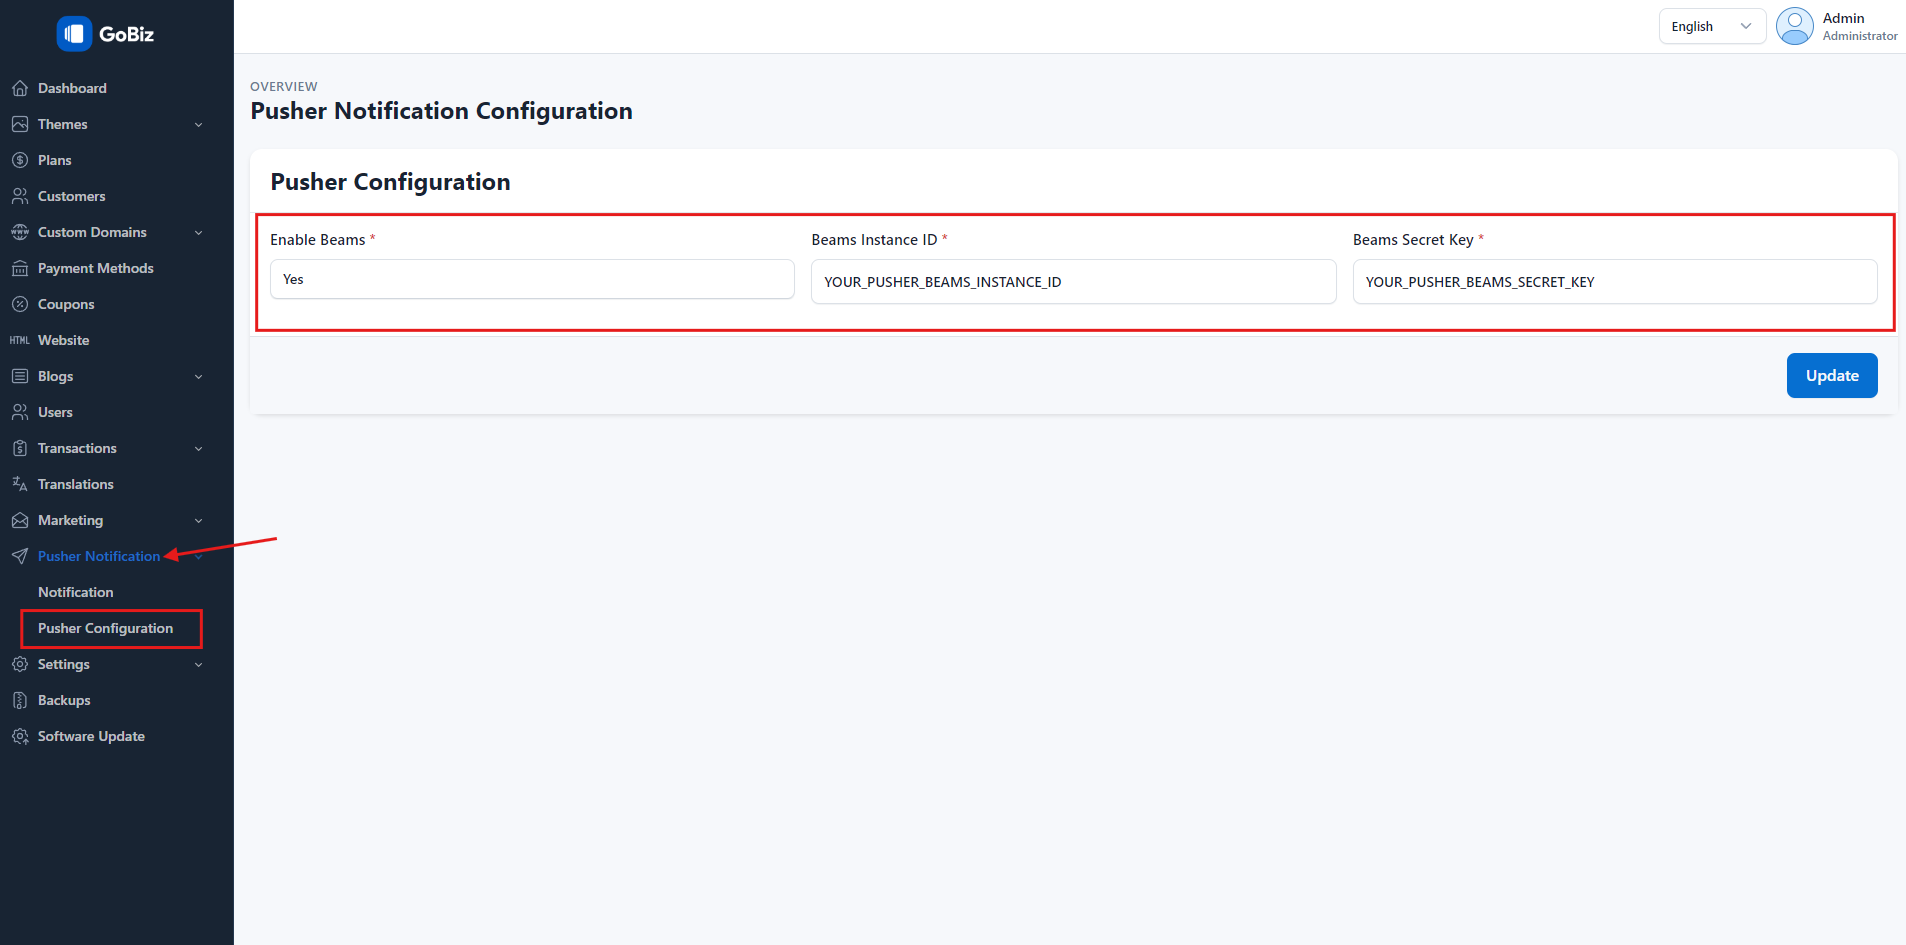
4. Admin Panel Setup
In the admin panel, go to Pusher Notifications -> Pusher Configuration paste the Instance ID and Secret Key in the respective fields. Then, click Update to save your changes